In my final project for upper secondary school, I developed a mobile planetarium, or maybe more fittingly a space pointer. It detects its current position and can then point at user-supplied celestial objects, such as planets or stars, with a powerful laser pointer. In a similar fashion, it can also visualize the future trajectory of the chosen object. Development involved, among other things:
- Designing parts with CAD software and 3D printing them
- Programming stepper motors and interfacing with an LCD display, a GPS sensor and an RTC through an Arduino Uno and Raspberry Pi
- Understanding required astronomical equations for computing the user’s direction towards the sun, moon, planets and galaxies and implementing them in Python
- Building a simple user interface
Demo Video#
Computing Planetary Positions#
I’ll spare you most of the mathematical details and astronomical jargon involved in computing a planet’s current position, and instead, offer a high-level overview. If you’re eager to dive into the nitty-gritty equations and processes, I highly recommend this tutorial by Paul Schlyter.
For simplicity, I use a two-body approximation rather than tackling the more complex N-body problem. As you might already know, in this approximation, a planet’s orbit can be represented as a simple ellipse. Describing this orbit requires two parameters for its shape, three for its orientation (relative to a chosen reference coordinate system), and one for its angular velocity—these six values, known as Keplerian elements, uniquely define the orbit of a planet.
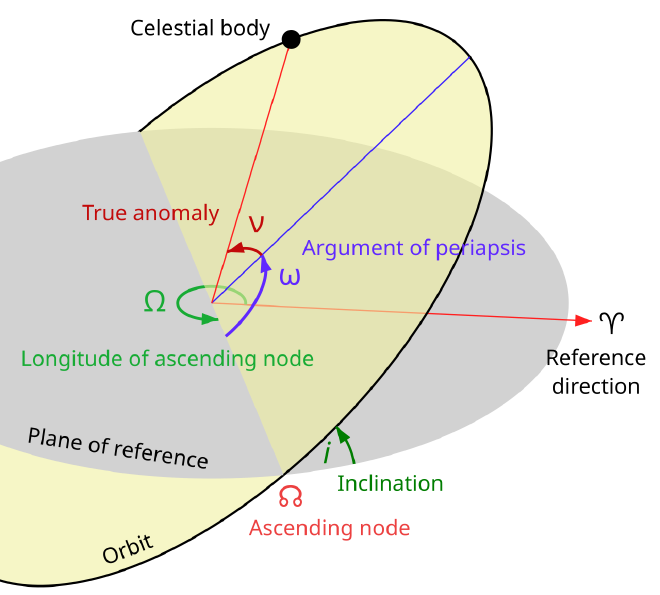
Using these parameters along with the current time, we can determine the planet’s position relative to the sun, known as heliocentric coordinates, where the sun is at the origin. Since you’re probably not observing the universe from a vantage point inside the sun’s core, we first need to change coordinates to place the Earth at the origin (geocentric coordinates). This is followed by a final shift to topocentric coordinates, centering the origin on your exact location (GPS required!). With the planet’s topocentric coordinates, we can calculate two key angles—the azimuth and elevation—that tell us the direction of your favorite planet in the night sky.
Assembly#
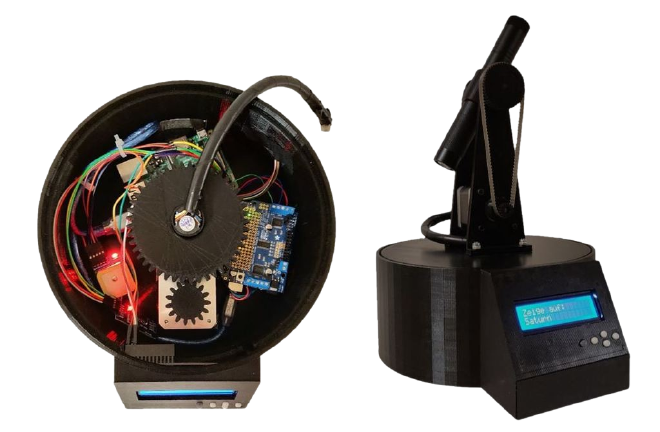
Electronics#
Apart from batteries and cables, the planetarium consists of the following parts:
- Raspberry Pi 3B: Handles calculations and the user interface
- Arduino Uno: Controls stepper motors
- Two NEMA 17 Stepper Motors: One for azimuth, one for elevation
- LCD (+ Keypad): For user interaction
- Powerful Laser Pointer: Unfortunately, most of the cool ones were banned in Switzerland since June 2021, so try not to be illegal
- GPS Module
- Slip Ring: Prevents cables from getting hopelessly tangled after repeated rotations
3D Printed Parts#
I designed most parts using the very beginner-friendly TinkerCAD.
Since this was my first attempt at 3D modelling, the process was quite iterative, involving plenty of trial and error.
Here’s a rendering of all the 3D-printed components: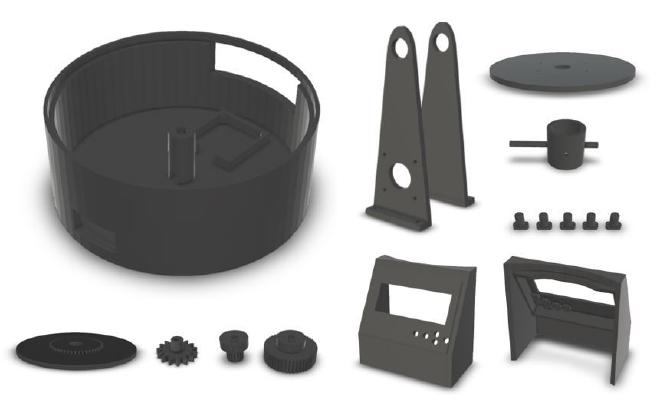
Code Repository#
In this repository, you’ll find all the code I developed for the Arduino Uno (written in C++) and the Raspberry Pi (written in Python), along with the required 3D models.
Trophy Shelf#
This project was a blast to work on (well, except for the occasional headache of hardware debugging), and it even earned me a couple of awards:
- 🥇 Award by upper secondary school Frauenfeld
- 🥇 Award by Thurgau Society of Natural Sciences (TNG)
- 🥉 “Space Award”, bugnplay (Migros Culture Percentage) / Swiss Space Office